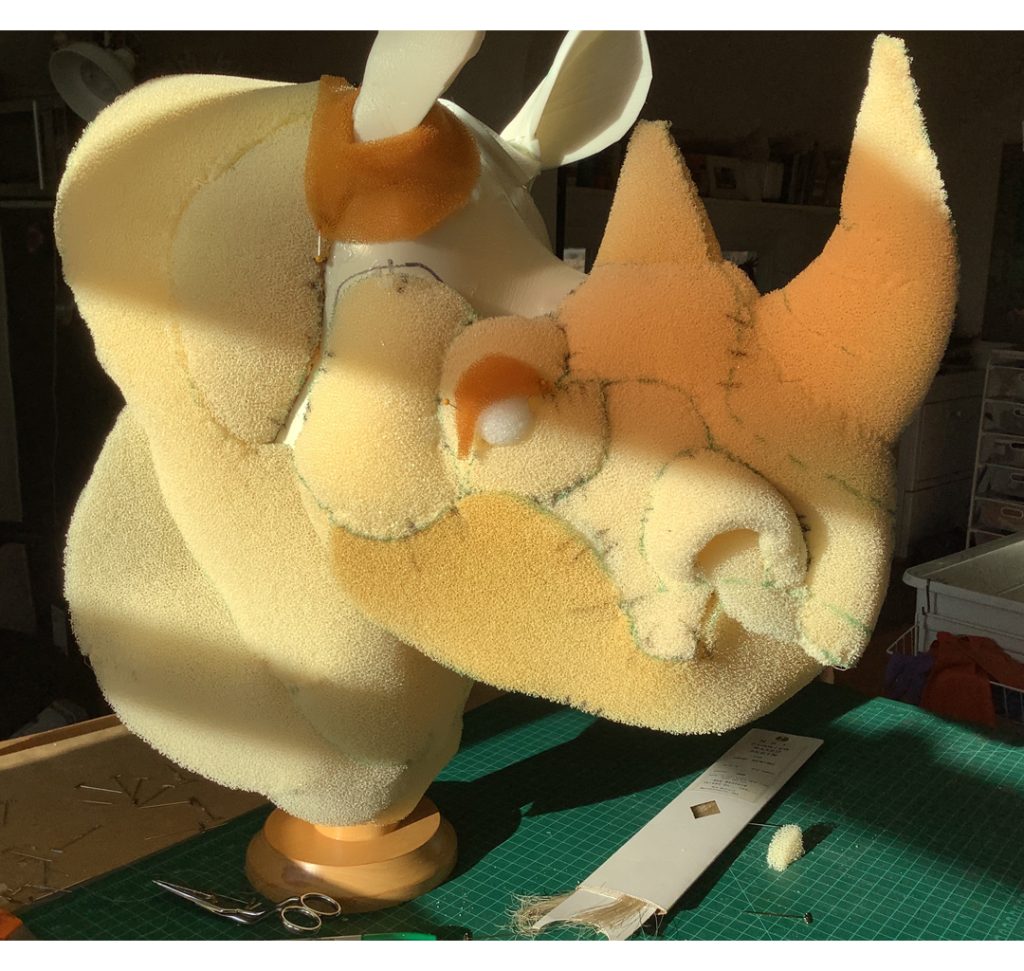
Because I do both fiber sculptures and art quilts I draw on a variety of techniques and resources to develop my ideas and imagery. I find a lot of inspiration for projects in the news, on Instagram, and on Pinterest. Because of my theater training I also greatly enjoy collaborating with other artists and photographers.
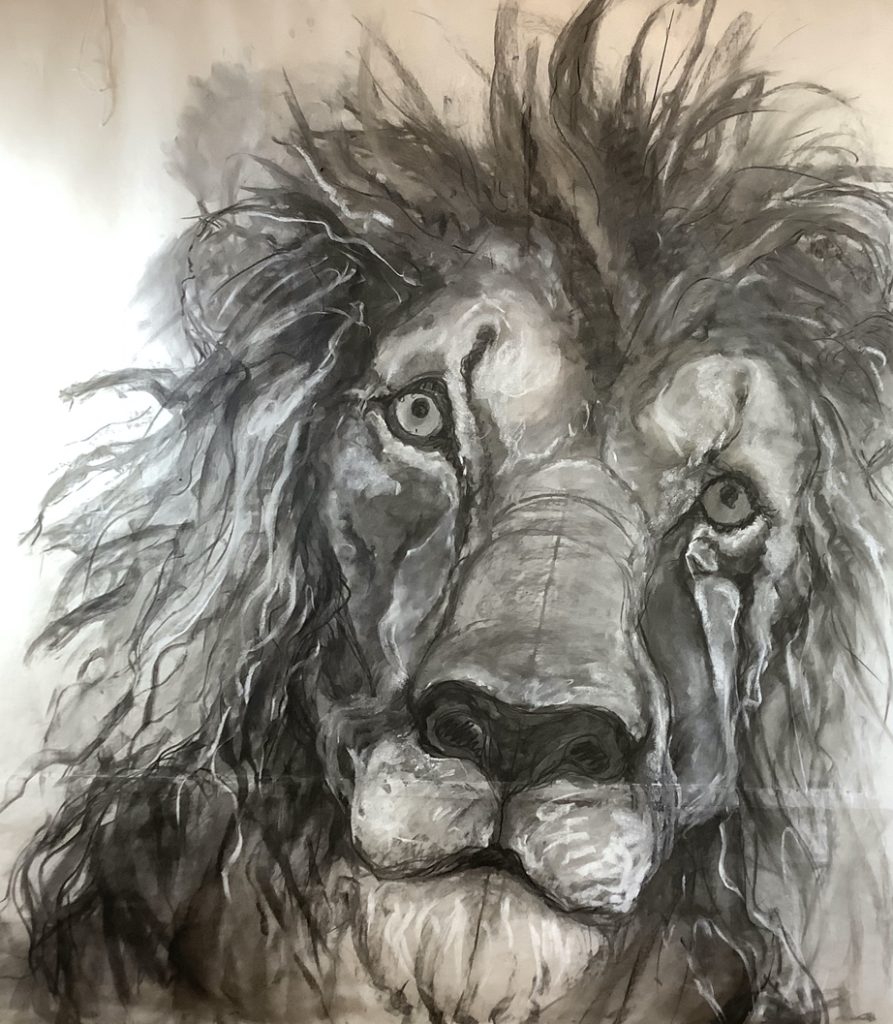
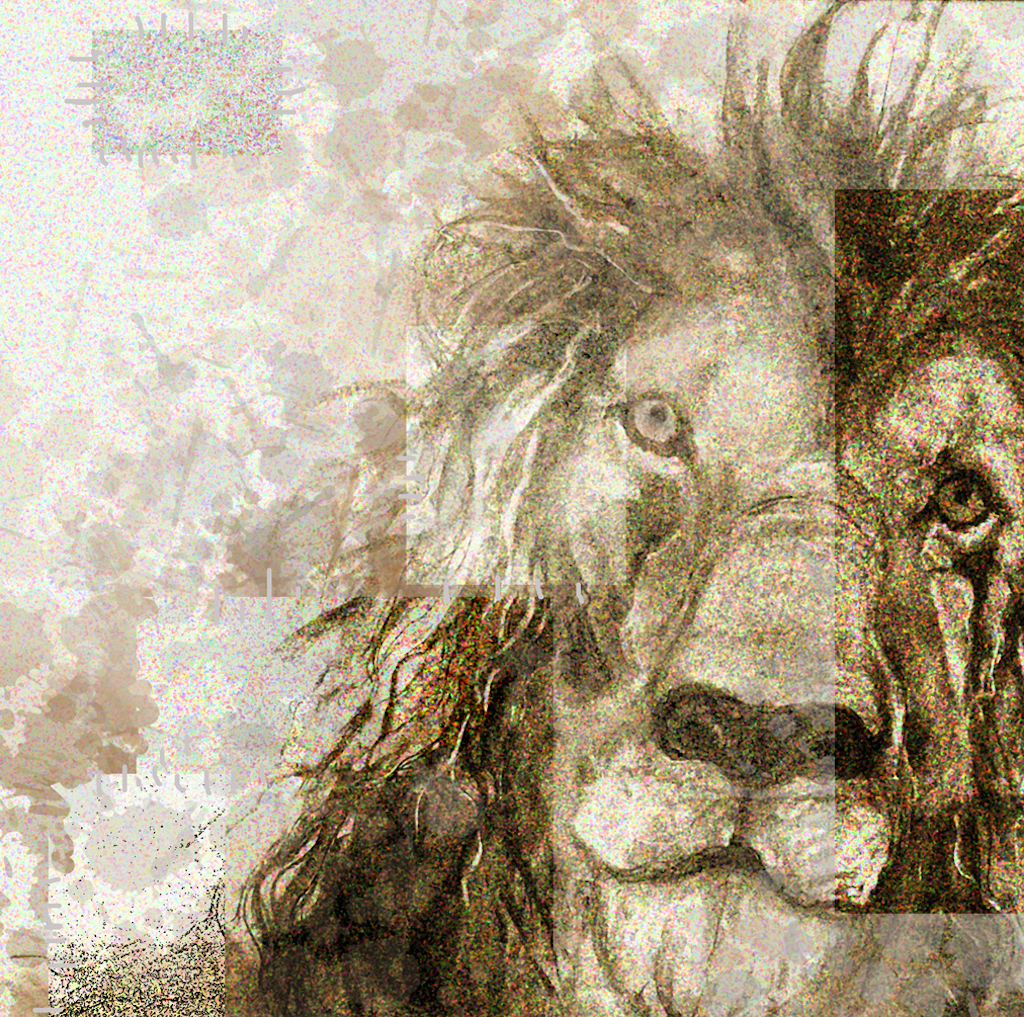
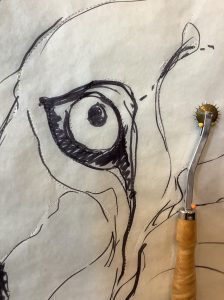
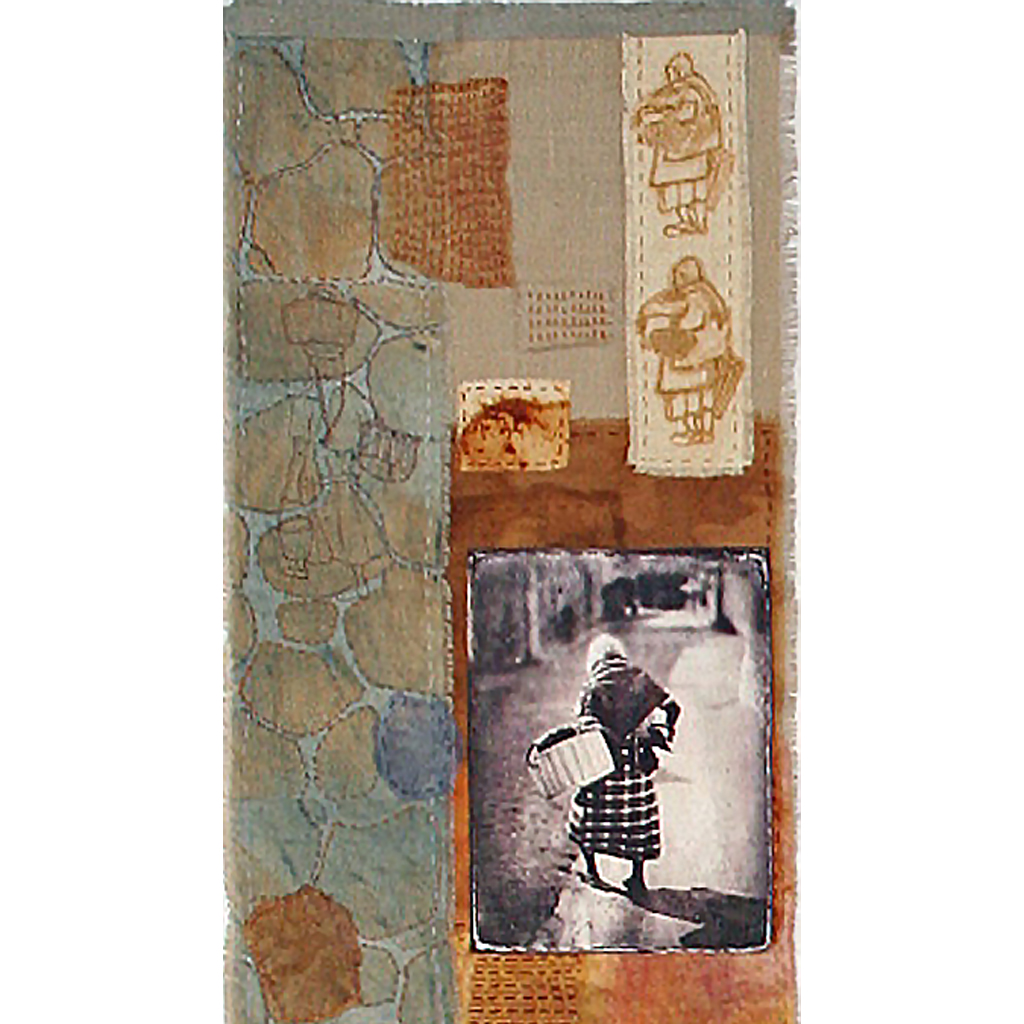
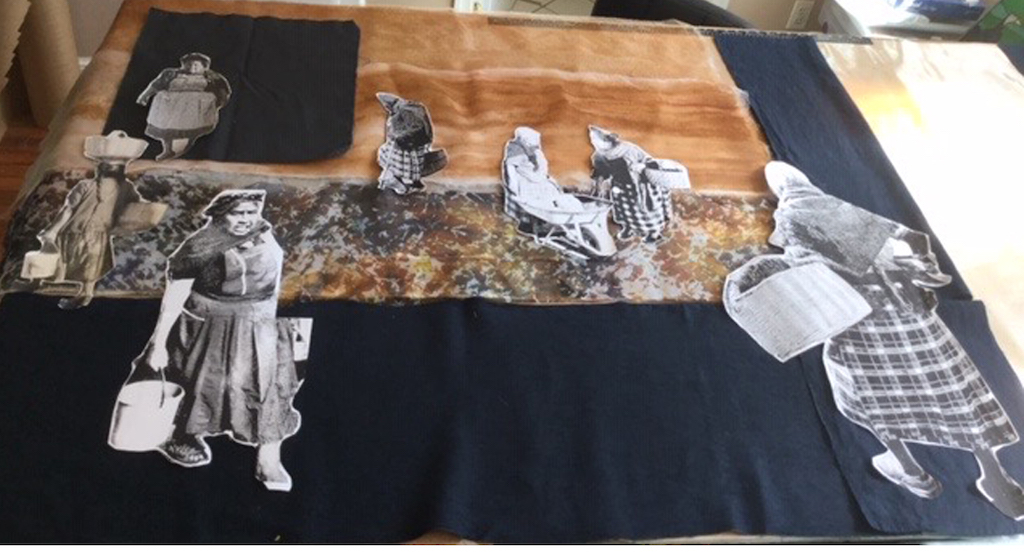
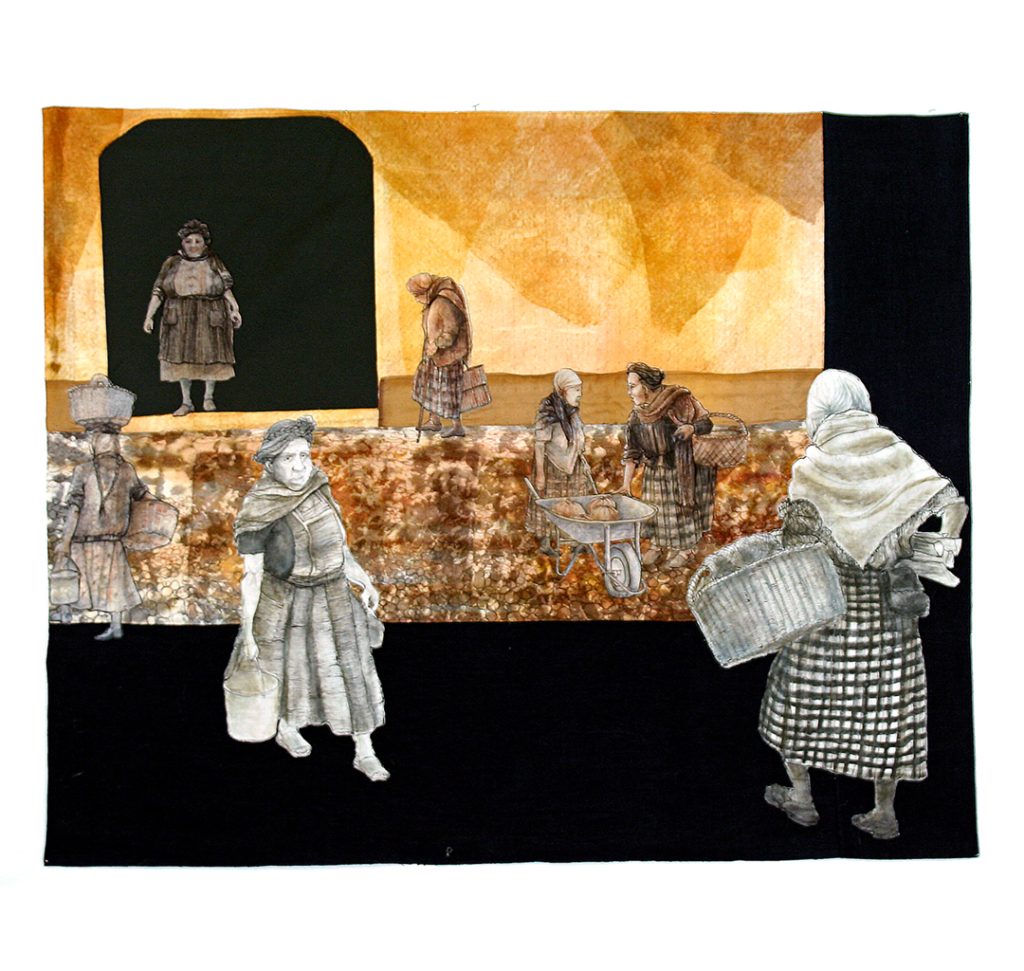
While I enjoy the improvisational nature that comes with drawing, painting, and dye work I am by nature a planner when it comes to developing the composition for a work. I do a lot of research into animal anatomy and develop drawings occasionally by tracing but generally by hand drawing. I enjoy playing with layering and re-arranging compositions in Photoshop Elements. I will dip into silkscreening, stamping, stenciling, and occasionally collagraphing to create imagery. And I use a wide variety of media to color the images including fabric paints, Sumi inks, pastels, and fabric dye.
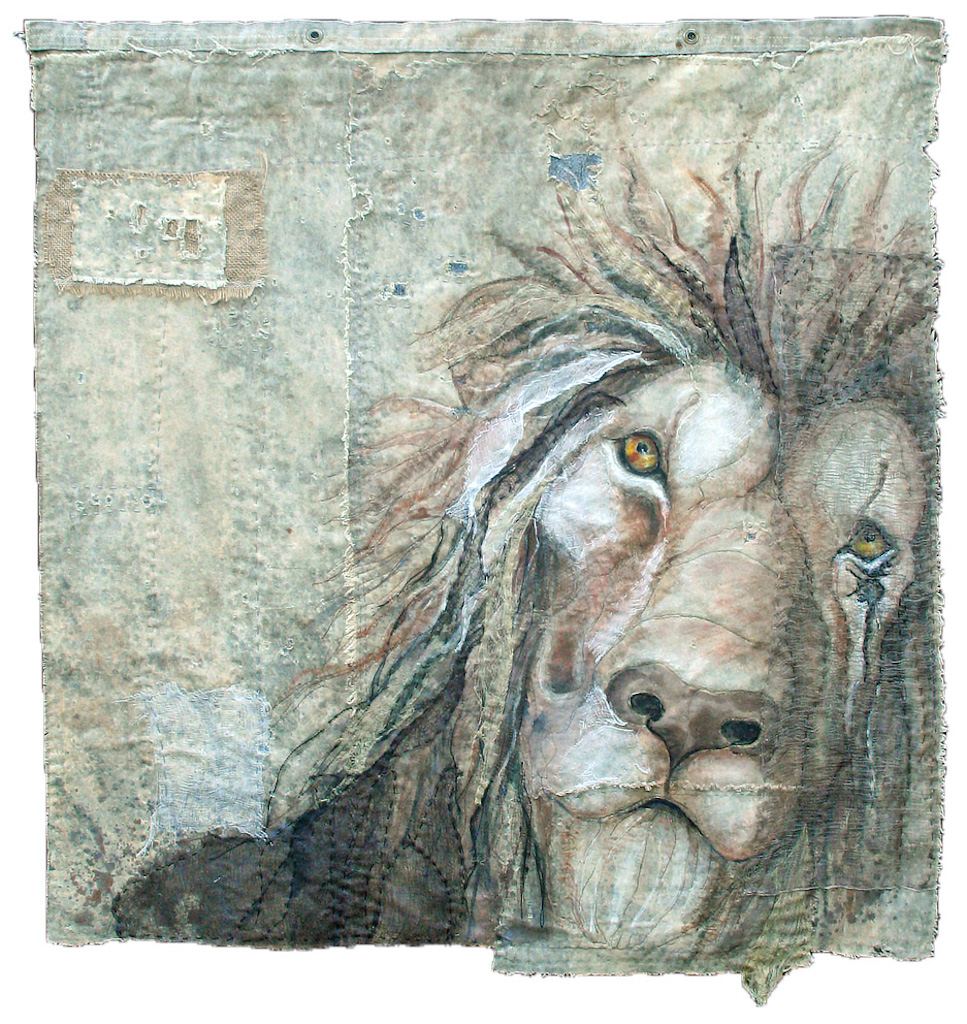
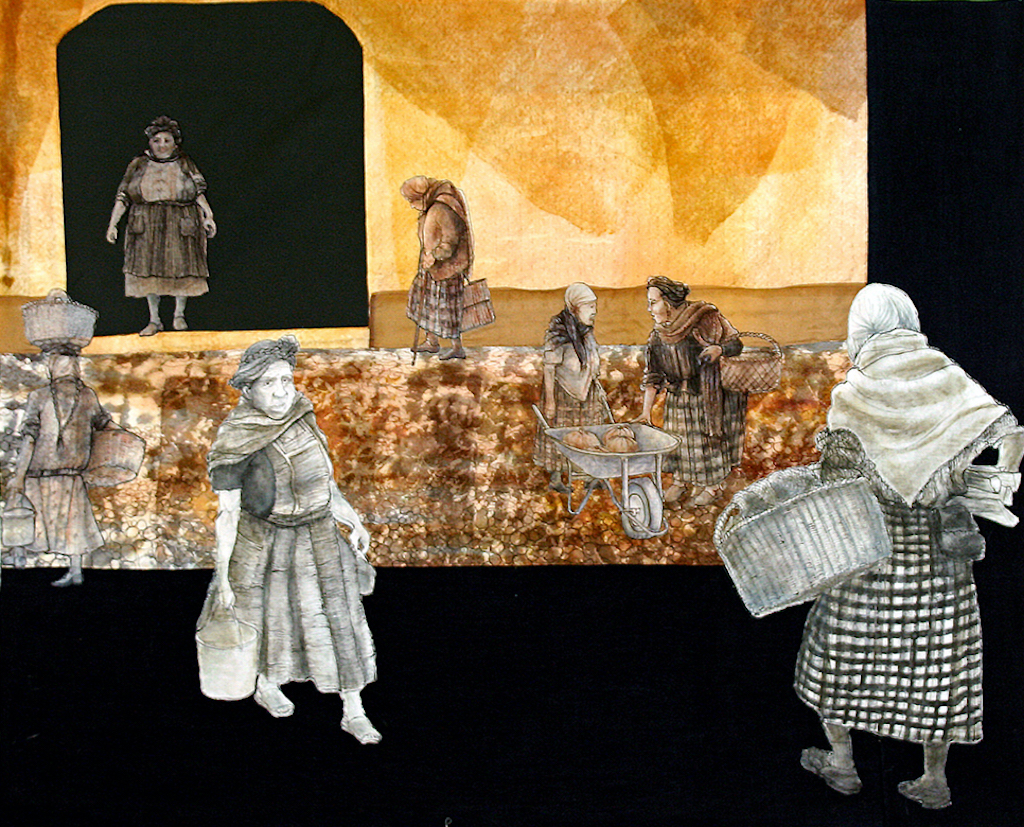
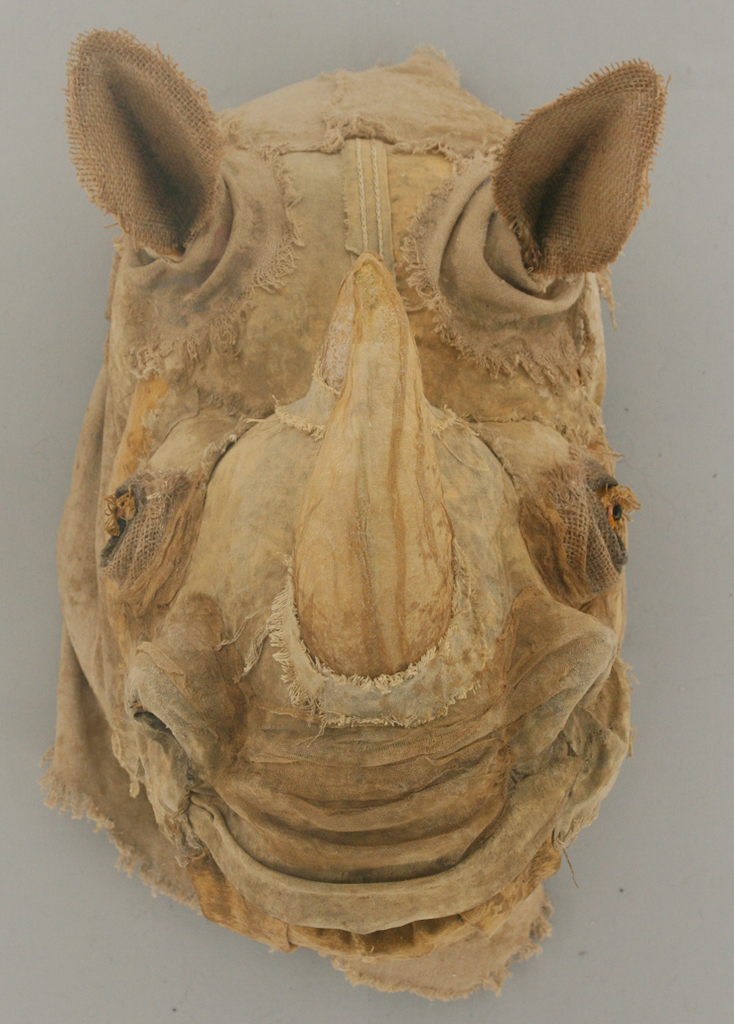
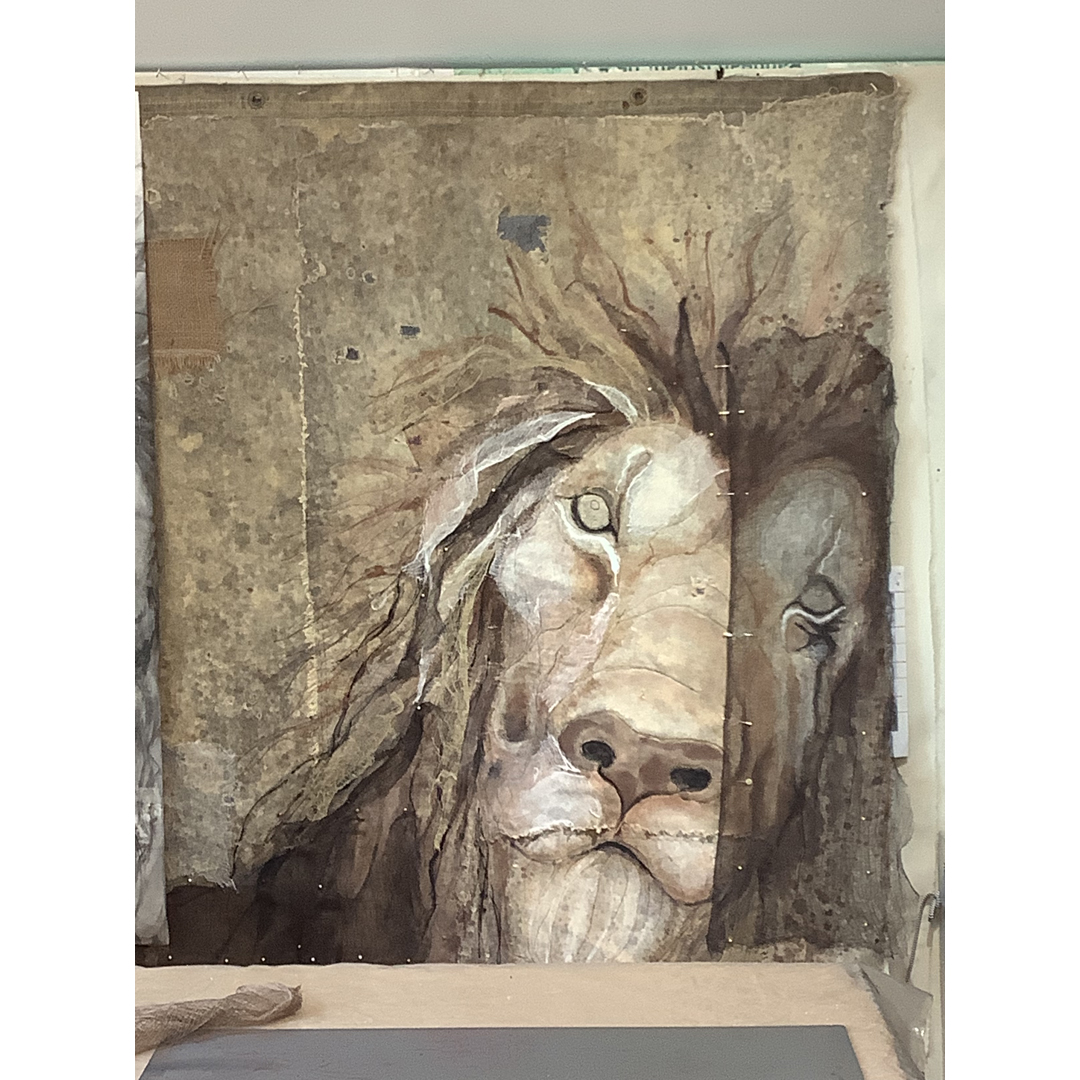
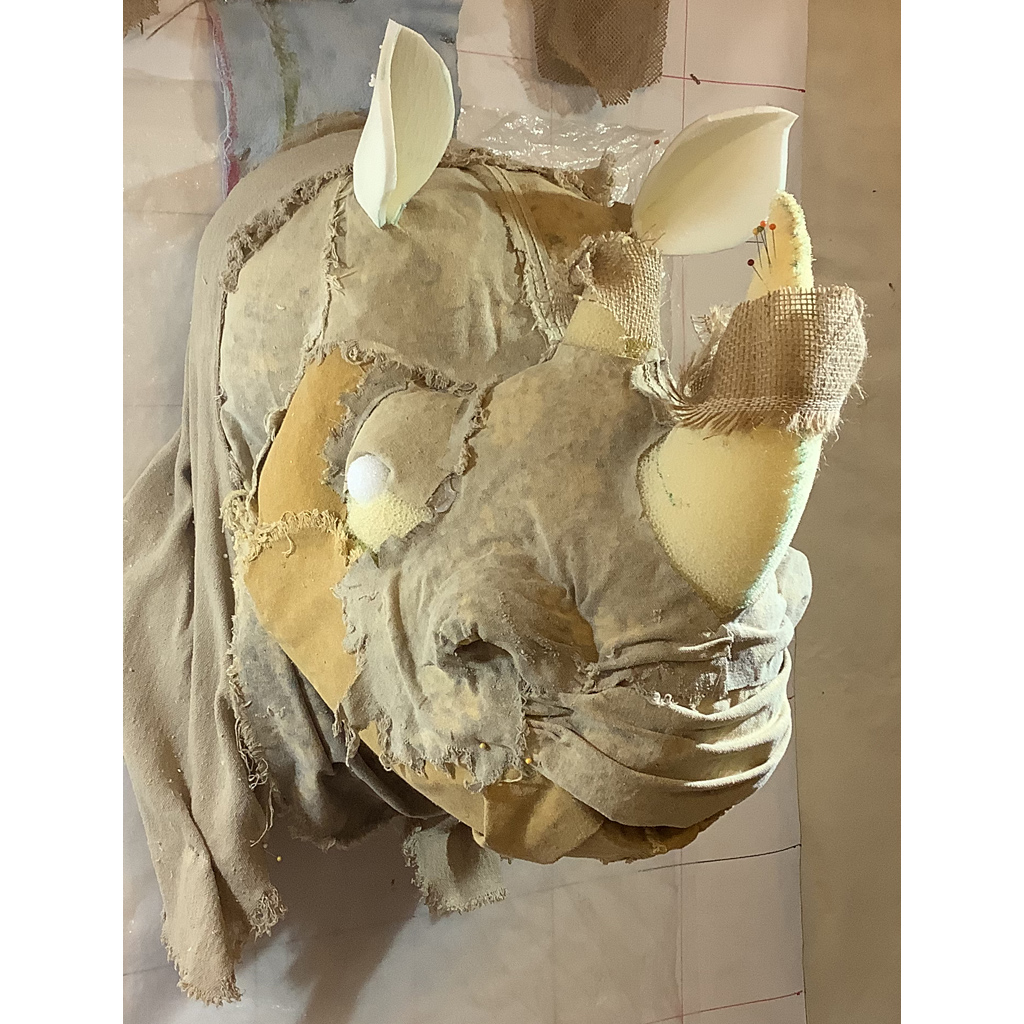
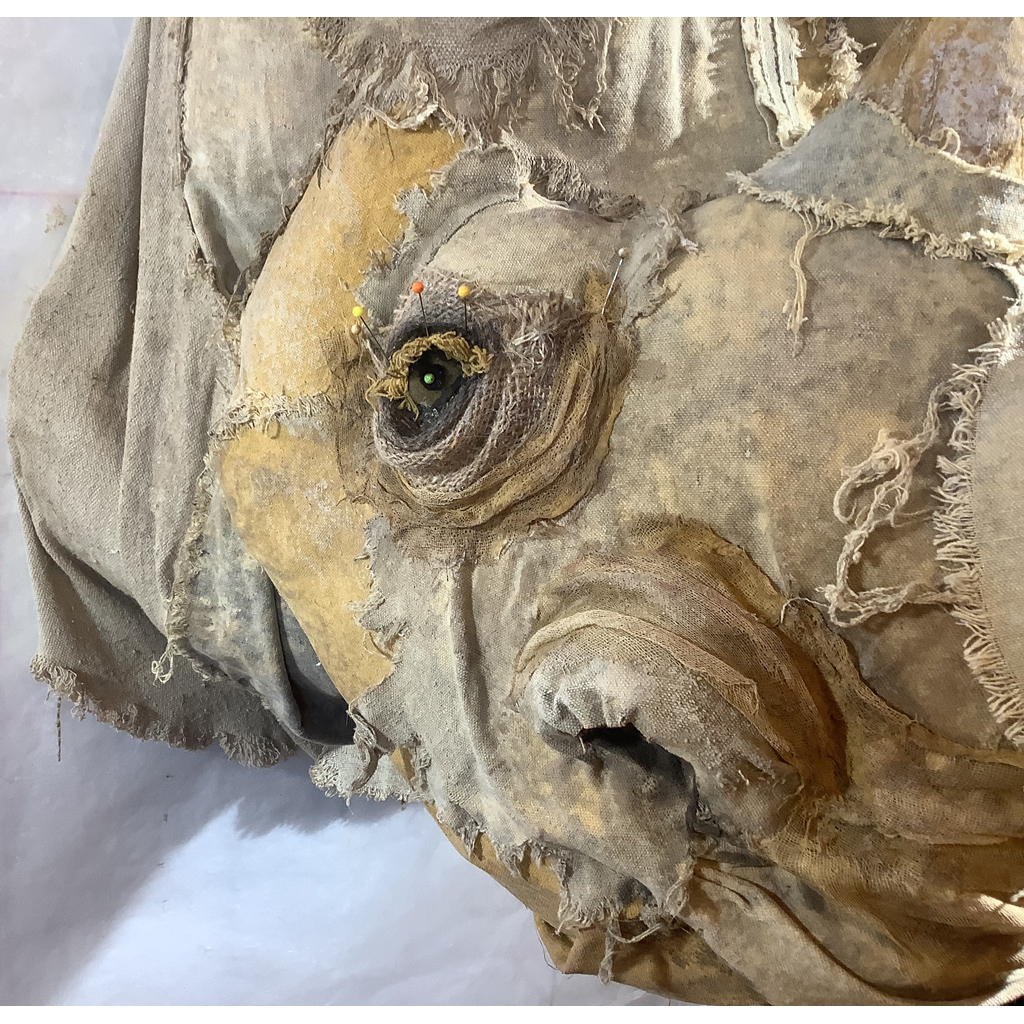
In this section I will take you through three of my processes on projects: developing a portrait, developing a complex multi-figure composition, and creating a fiber sculpture.
Portrait Process — Veteran Series: The Old Lion
Poses with emotional connections are my priority in portraiture. I saw an image of an old scarred lion and fell in love. I got permission from the photographer Leighton Lum to develop drawings based on several of his photos of the oldest lion in Kenya.
As I work out a portrait’s drawing I think a lot about how I want to layer the fabrics and how the quilting can add to the emotional impact of the image. A friend gave me a gloriously beat up, heavily stained, and damaged old tarp which felt like the perfect metaphor for this old lion. Hand quilting and embroidery felt like the best solution to the quilting since they denote a loving-hands-at-home quality and I wanted the viewers to really care about this lion.
I started reconfiguring the pose by drawing with vine charcoal on tracing paper, which supports a lot of erasing and redrawing.
I wanted the final effect of the image to feel tender, worn, and loved, so I decided that adding some areas of cheesecloth and patches would add to the feel of fragility that I wanted.
With a new layer of tracing paper, I traced over the key lines of the charcoal drawing and developed a pounce pattern to transfer the drawing to the tarp.
I then painted the image and added an army blanket backing. I started adding patches and cheesecloth layers with hand quilting.
The final quilt with patches and hand quilting.
Complex Image Quilts – Come and Go
I worked with the imagery over several weeks, at first, by combining digitally printed photos and drawn pieces, with rust-dyed and silkscreened fabrics to capture the patterns of the stone and tile work in the town.
But I felt a need to zero in more on the ladies so, I blew up the photographs in different scales to explore different compositions and approaches to the style of the piece.
I wanted the imagery to create a strong emotional connection with the viewer, but within a style that promoted some abstraction and removal from naturalism. So, I decided to develop highly detailed ink tracings of the photographs onto cotton organdy, rather than digitally printing the photographs.
And to add depth to the image, I used the black background to create the feeling of a frame and then had several of the characters break the frame by walking into the viewer’s world.
A Fiber Sculpture — The Veteran Rhino sculpture process
The Rhino and Elephant Veteran sculptures were developed in an approach I learned while working at the Muppets. I knew I wanted to cover them in the war surplus and damaged tarp fabrics I’d used in the rest of the Veteran series, but I needed a light weight and sturdy base underneath.
At the Muppets, I learned the shaping potential of different types of sheet foams and how to develop a sculpture using draping and flat patterning techniques.
Draping the foam onto a wig stand to create a flat pattern is the trickiest part of the process. The patterns can get very complex as they get refined.
The face has a sturdy 1/4″ white mini-cell foam base that will anchor the additional 1/2″ beige reticulated foam layers that build out the planes of the head and neck. The reticulated foam can be hand-stitched together and glued to the mini-cell base.
There is a backing plate of 1″ styrofoam glued to the back of the face to set the final dimensions of the head and support a quilt pocket for final wall-hanging rigging.
After the foam is assembled, a new cover pattern is draped in muslin and used to cut out the final tarp and sacking fabrics.
Then section by section, I glued and stitched the cover layers onto the foam base.
Once the cover was in place, I did final cheesecloth surface treatments and painting.
